Identity
Samuel Golding


These are double exposure shots using a model and a bush. I did a variety of different ways to portray the edits by using Black & white and colour variations.
My favourite is the Coloured Bush with the Black & White Model.
I did The edit in multiple ways to test which goes well together. Personally, I think the edit labelled "Coloured bush, B&W Model" Is the best edit, and then goes down in the order of:
1.) "B&W Bush, B&W Model"
2.) "Colour Bush, Colour Model"
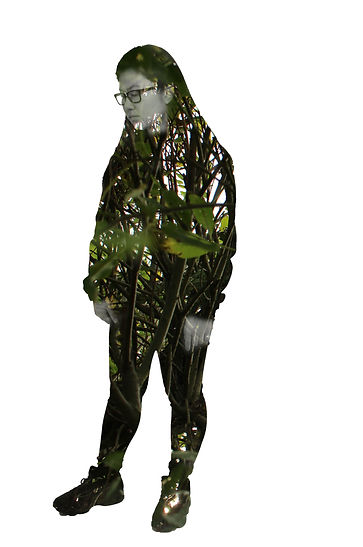
3.) "B&W Bush, Colour Model"
Colour Bush, B&W Model
Colour Bush, Colour Model
B&W Bush, Colour Model
B&W Bush, B&W Model
I really like this image as i like how the desaturated model emerges from the image which is a bush in colour.
The blending of the hands and the head emerging from the bush is a nice touch and good practice for my final edit.
For my final edit i want to do a similar edit using a full body shot and a background representing an emotion such as a grey cloud for being sad, a sunny landscape for being happy and a fire for being angry.


Double Exposure
Process Notes For Double Exposure
Start of with full body shot.
Go down to the "Channels" Tab and pick out the colour with the most contrast. So in my case it would be "Blue"
Create a copy of this chosen colour
With the copied colour, Still in the "Channels" Tab, Go to "Image", "Adjustments", and then "Levels"
Move the levels down to black out the model but without making the edges stick out to much.
After blacking out the model, you may come across white areas still showing such as this.
Get a black brush with a hard tip and colour in the model to get a silhouette looking shape.
Now that this is done you can easily select the model outline
Re-enable the "RGB" layer on the "Channels" tab and then go back to layers
To get the white background. hold down command and delete (CMD+Delete) and click on the background layer.
Add in the second image to which you will use to double expose.
and scale/rotate/position
it to the position you need it to be.
Move this image above layer one and then command click (CMD+Left Click) on layer 1 to get the selection.
Still having the bush layer selected and the model selection present, create a mask using the model selection.
Select layer 1 and duplicate this layer
Put this duplicated layer and change the layer blend mode to "Screen"
It should turn out like this
Select layer 1's copy and desaturate the layer.
do this by going to "Image", "Adjustments", and then select "Desaturate"
After desaturation. it should look like this.
To blend the rest of the image, such as Getting rid of parts of the model to blend the model and the bush.
Get a brush with a soft hardness and make sure the colour is black and go over the model to blend it together.

Initially, the original idea for this experiment was to use a mason jar i ended up not being able to get hands on one. For problem solving, I instead used a Smart Water bottle.
Process


